How to Clean Up Your Mac’s Hard Drive
It is undoubtedly an alarming situation when your hard drive is running out of free space. The most important cause of the phenomenon is the accumulation of various kinds of unnecessary files that gradually take up free space reducing the device’s speed. The remedy is usually obvious: you should clean up your hard drive. But there are a number of methods to do so and all of them are worth learning.
In this guide, we will show you how to clean a hard drive on a Mac using both built-in tools and several specialized apps.
Before removing files from the hard drive, it would be wise to make its backup. For this purpose use Apple’s Time Machine as it will produce the simplest and safest backup.
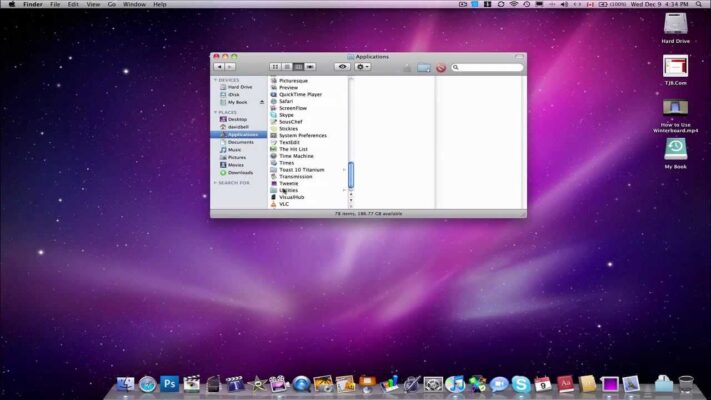
You can easily check if you really need to clean up your drive by opening Finder and then MacBook on the Devices section on the left-hand Sidebar. After that, you select the main storage device (usually it is a Macintosh HD). You may alternatively right-click it and select Get Info from the popup menu.
When Finder displays Status Bar, you can find a text on the bottom. If not, to show it you should click on View on the menu and select Show Status bar or use keyboard shortcut COMMAND*/. In that way, you will see how much free space is left on your hard drive.
Emptying the Trash
The next recommended step is to take out your Trash. Open the Trash folder, and then click on the Dock at the right end to open the folder in Finder. Make sure there is nothing that you really need.
Select Finder menu and click on Empty Trash. Confirm your intention when OS X asks you if you are sure, and the files will be permanently deleted.
Moving along the same path that we mentioned above, you can learn how much free space you have cleared. If you are satisfied with the free volume that you have, then the job is done. If not, let us remove more junk from your Mac hard drive. For this to be done, we will use special cleaner apps.
How to clean a hard drive on a Mac with specialized utilities
We will guide you through a few useful apps developed specifically to assist the users in cleaning their MacBook hard drives.
MacFly Pro
The last but not least of the apps in this guide is MacFly Pro consisting of three modules: Smart Assistant, CleanUp and Tools. All the modules can perform background scanning, but each has its specialized functions.
For example, Smart Assistant monitors the system’s general condition and provides the user with notifications about possible improvements. So, the latter can either apply the proposed change instantly or postpone it. Such improvements mainly include removals of junk files.
CleanUp is supplied with a widely customizable scan that allows filtering the files and grouping them by type (such as temporary files, old caches, cookies etc.). The module has a handy interface and easy navigation ensuring a simple and safe cleaning procedure.
Tools do an especially deep scanning to find not only obvious junk files but also dubious files. Their removal is subject to the user’s discretion. The module excellently uninstalls unnecessary apps leaving no leftover files.
DaisyDisk
Launch DaisyDisk and start scanning by clicking on Scan button next to your Hard Drive. DaisyDisk will scan the hard drive and then will display the drive’s storage allotment on an interactive pie chart. Hovering over the chart’s sections, on the right you will see how much space is occupied by each folder. Click the colored section to display the folder’s content in another pie chart. Clicking on the circle’s center will bring you one level up on the folder tree. Or you may select folder names on the toolbar.
If you consider that some folder occupies too much space and contains files that are not important for you, right-click on that folder and select Show in Finder. And in Finder, you can easily delete files or move them elsewhere to clean the space. The only flaw is that the scanning process is taking too much time and because of that, I think, it is not as efficient as it seems.
Clean My Mac
Clean My Mac scans the drive in the same way as a DaisyDisk. But after scanning it finds files for removal by itself. On completing the scanning, the app displays the following screen.
Clicking on the icons will open you the section’s content. To better control the process of removal, you may click on the corresponding folder in the left-hand column.
For example, in the System Junk section, we see the following items:
- User Cache Files
- Language Files
- User and System Log Files
- System Cache Files
Clicking on each opens more detailed info. Thus, the User Cache Files contain the following items:
- iCloudKit
- Chrome
- iTunes Cache
- Safari Cache
- Other Mac App Caches
Unchecking an item in the list will cancel its removal.
Before actual removal, you can get detailed info about each file with the use of Review Files button. The Large & Old Files section displays the files by size groups. You can also preview the files before their removal by clicking on an eye icon next to the magnifying glass.
Each section has a Clear button to delete just that section’s selected files. Among other things, Clean My Mac can uninstall apps. Besides, it can perform various maintenance functions including flushing the DNS cache and repairing disk permissions.
Although, from all suggested apps, this one is the most expensive and its trial version doesn’t offer all of the functions provided by this app.
HD Cleaner
The HD Cleaner, available from the Mac App Store, lacks many features of the other apps in this guide, which can be assumed since it’s free. When you open a folder, the app begins to scan it. Then you may command it to Delete all the files in the folder or uncheck files that you wish to keep. You can open those files in Finder by clicking the folder icon next to each item in the list. A more detailed list of a folder that HD Cleaner proposes to remove can be opened with a button on the upper right.
SpeedMac.org team tries to keep its focus on everything related to IT and be worthy of calling ourselves professionals. No matter what issue you have about your Mac or iPhone, we are here to help you and provide with solid facts and helpful tips.
SpeedMac.org 2023